I've been asked about painting jigs so I thought I'd put together how I color mine as my daughter (the hand model) and I have been having a BLAST painting jigs the last few days......
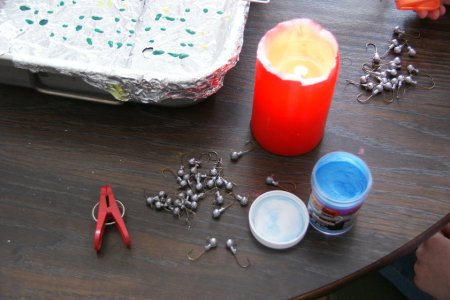
Here are the pieces and parts I use. I use a chip bag clip to hold the jig as using a pliers tends to have jigs fall off if you release pressure. The clip keeps constant pressure on the jig so I can control it. The candle is for heat and the rest is self explanatory.
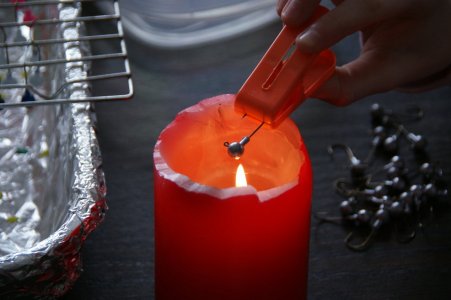
Step one: Heat the jig head until it's hot enough to melt the powder paint. For an 1/8th oz jig it's about a 5 count on each side.
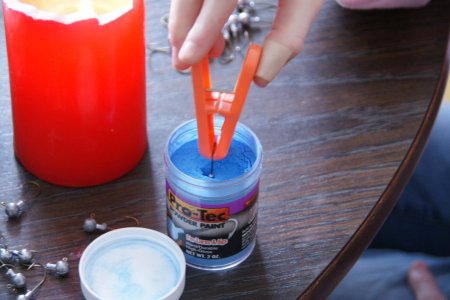
Once the jig is hot, dip it quickly into the powder paint and shake off the excess. In this case the paint is "Candy Blue"
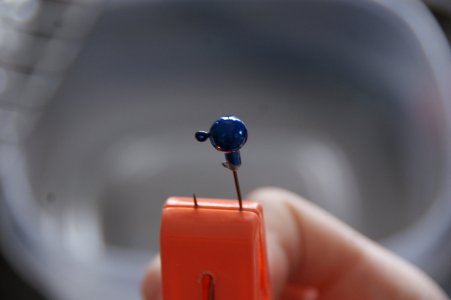
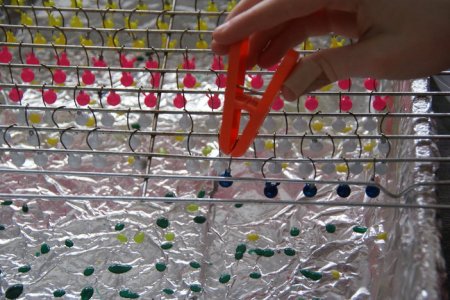
Make sure there aren't any unmelted paint lumps in the coating or you will end up with some funny shaped jig heads. The end result should be a smooth surface that has a glossy shine to it. It helps to keep the jig oriented like the pic until the paint cools as if you hang a jig before the paint has set you will end up with a "Nipple Jig" or the "Reservior Tip" as some have called it.
Once the paint sets, I just hang them up to finish cooling on a cookie rack.
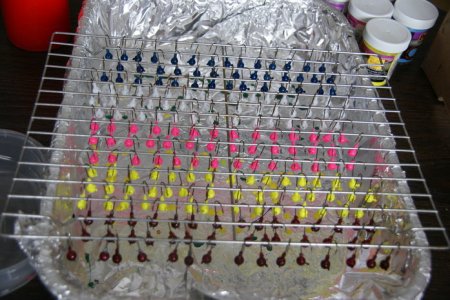
And the finished product line........
A few tips that I have discovered:
If you remove a jig from the powder and the paint doesn't melt giving the jig a "fuzzy" appearance, you need to heat up the jig a bit more.
If newly painted jigs come into contact with other jigs, the paint can make the two stick together, which can make for some interesting color jobs.
The bigger the jig, the longer you will need to keep it over the heat source and vice versa. IT IS POSSIBLE to melt the lead off a jig with just a candle. Don't ask me how I know.
I don't bake my jigs as I usually loose the jig or have to retie a dull hooked jig before the paint chips off. I have baked them and it didn't seem to significantly increase the durability with the exception that the hook eye is MUCH MORE DIFFICULT to clean out if they have been baked in comparison to the unbaked jigs.
Coloring you own jigs is VERY easy and as you can see, it doesn't take much equipment to accomplish. Enjoy!!!
Here are the pieces and parts I use. I use a chip bag clip to hold the jig as using a pliers tends to have jigs fall off if you release pressure. The clip keeps constant pressure on the jig so I can control it. The candle is for heat and the rest is self explanatory.

Step one: Heat the jig head until it's hot enough to melt the powder paint. For an 1/8th oz jig it's about a 5 count on each side.

Once the jig is hot, dip it quickly into the powder paint and shake off the excess. In this case the paint is "Candy Blue"

Make sure there aren't any unmelted paint lumps in the coating or you will end up with some funny shaped jig heads. The end result should be a smooth surface that has a glossy shine to it. It helps to keep the jig oriented like the pic until the paint cools as if you hang a jig before the paint has set you will end up with a "Nipple Jig" or the "Reservior Tip" as some have called it.

Once the paint sets, I just hang them up to finish cooling on a cookie rack.

And the finished product line........

A few tips that I have discovered:
If you remove a jig from the powder and the paint doesn't melt giving the jig a "fuzzy" appearance, you need to heat up the jig a bit more.
If newly painted jigs come into contact with other jigs, the paint can make the two stick together, which can make for some interesting color jobs.
The bigger the jig, the longer you will need to keep it over the heat source and vice versa. IT IS POSSIBLE to melt the lead off a jig with just a candle. Don't ask me how I know.
I don't bake my jigs as I usually loose the jig or have to retie a dull hooked jig before the paint chips off. I have baked them and it didn't seem to significantly increase the durability with the exception that the hook eye is MUCH MORE DIFFICULT to clean out if they have been baked in comparison to the unbaked jigs.
Coloring you own jigs is VERY easy and as you can see, it doesn't take much equipment to accomplish. Enjoy!!!
