Clam Plate Mount Trigger Modification

defiant1

Honored Member
Joined
Jan 14, 2016
Posts
240
Likes
2
Points
110
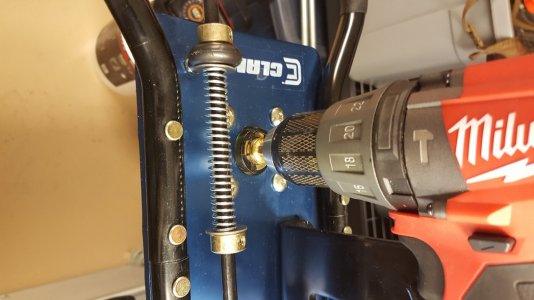
Saw this modification on FB and figured I would install it on my Clam plate. I use a M18 Milwaukee Drill with Kdrill auger. I do like the controlled action of the Clam Plate trigger bar modification much better than the loose tolerance factory specs.

The parts used are (can get at Menards):
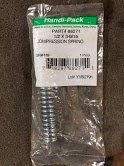
Qty: 1 - Handi-Pak Compression spring 1/2x3-9/16: Part #88271
Qty: 2 - Handi-Pak 3/8" Shaft Collar with Set Screw Part #83942
Optional: Stainless steel washers 3/8" and lock-tite for set screws.


d1

https://youtu.be/HHEBn86SQNY
 

Attachments

Clam plate mod.jpg Clam plate mod parts.jpg Clam plate mod parts2.jpg
Last edited:


defiant1

Honored Member
Thread starter
Joined
Jan 14, 2016
Posts
240
Likes
2
Points
110
What is gained by doing this? Just the trigger not flopping around?

That's it. Plus it takes any slack/slop out of the trigger, so you aren't inadvertently pulling the drill's trigger half way and not getting full power from drill. For around $6 in parts, it is a simple mod that isn't necessary, but I feel makes a better end product.

d1
 
Last edited:

Tommyboy

Founding Member
Founding Member
Joined
Apr 28, 2015
Posts
1,013
Likes
332
Points
293
Location
Grand Forks, ND
That's it. Plus it takes any slack/slop out of the trigger, so you aren't inadvertently pulling the drill's trigger half way and not getting full power from drill. For around $6 parts, it is a simple mod that isn't necessary, but I feel makes a better end product.

d1

Sweet mod for sure! I might have to do it.


MuskyManiac

Founding Member
Founding Member
Joined
Apr 23, 2015
Posts
3,660
Likes
195
Points
313
Location
Grand Forks, ND
I did it, and it's awesome. Thanks for the tip!! It was real nice having the part numbers, I used rubber washers instead.

mod.jpg
 

MuskyManiac

Founding Member
Founding Member
Joined
Apr 23, 2015
Posts
3,660
Likes
195
Points
313
Location
Grand Forks, ND
It took me a few minutes of thinking to realize I had to take the rubber grip off the handle and slide everything backwards through the rubberized eyebolt. The parts wouldn't fit on from the other direction because of the squared tip, and the tip wouldn't fit through the eyebolt.
 

defiant1

Honored Member
Thread starter
Joined
Jan 14, 2016
Posts
240
Likes
2
Points
110
I did it, and it's awesome. Thanks for the tip!! It was real nice having the part numbers, I used rubber washers instead.

th-77.jpg

Looks good. I have no doubt you will enjoy the operation of it better than before.

d1

- - - Updated - - -

It took me a few minutes of thinking to realize I had to take the rubber grip off the handle and slide everything backwards through the rubberized eyebolt. The parts wouldn't fit on from the other direction because of the squared tip, and the tip wouldn't fit through the eyebolt.

Good call, I forgot to mention that. Sometimes those rubber grips slide off. Mine did not and I had to cut it. I slid it back on and wrapped it in electrical tape until I can get some grip tape.

d1


Recent Posts

Friends of NDA

Top Posters of the Month

  • This month: 315
  • This month: 108
  • This month: 81
  • This month: 65
  • This month: 58
  • This month: 56
  • This month: 54
  • This month: 46
  • This month: 36
  • This month: 34
Top Bottom